e-Tax Invoice By Email ขั้นตอนการส่งเอกสารใน PEAK
ในบทความนี้เราจะมาอธิบายขั้นตอนการใช้งาน e-Tax Invoice By Email ซึ่งช่วยให้คุณสามารถส่งใบกำกับภาษีอิเล็กทรอนิกส์ผ่านระบบ PEAK ได้สะดวกรวดเร็วหลังได้รับการอนุมัติจากสรรพากร
ขั้นตอนการใช้งาน e-Tax Invoice by Timestamp มีดังนี้
1. การเชื่อมต่อ e-Tax Invoice by Timestamp
เมื่อได้รับการอนุมัติให้ใช้งานระบบ e-Tax Invoice By Timestamp จากกรมสรรพากรเรียบร้อยแล้ว สามารถทำการเชื่อมต่อระบบผ่านบัญชี Gmail หรือ G-Suite ตามขั้นตอนดังนี้
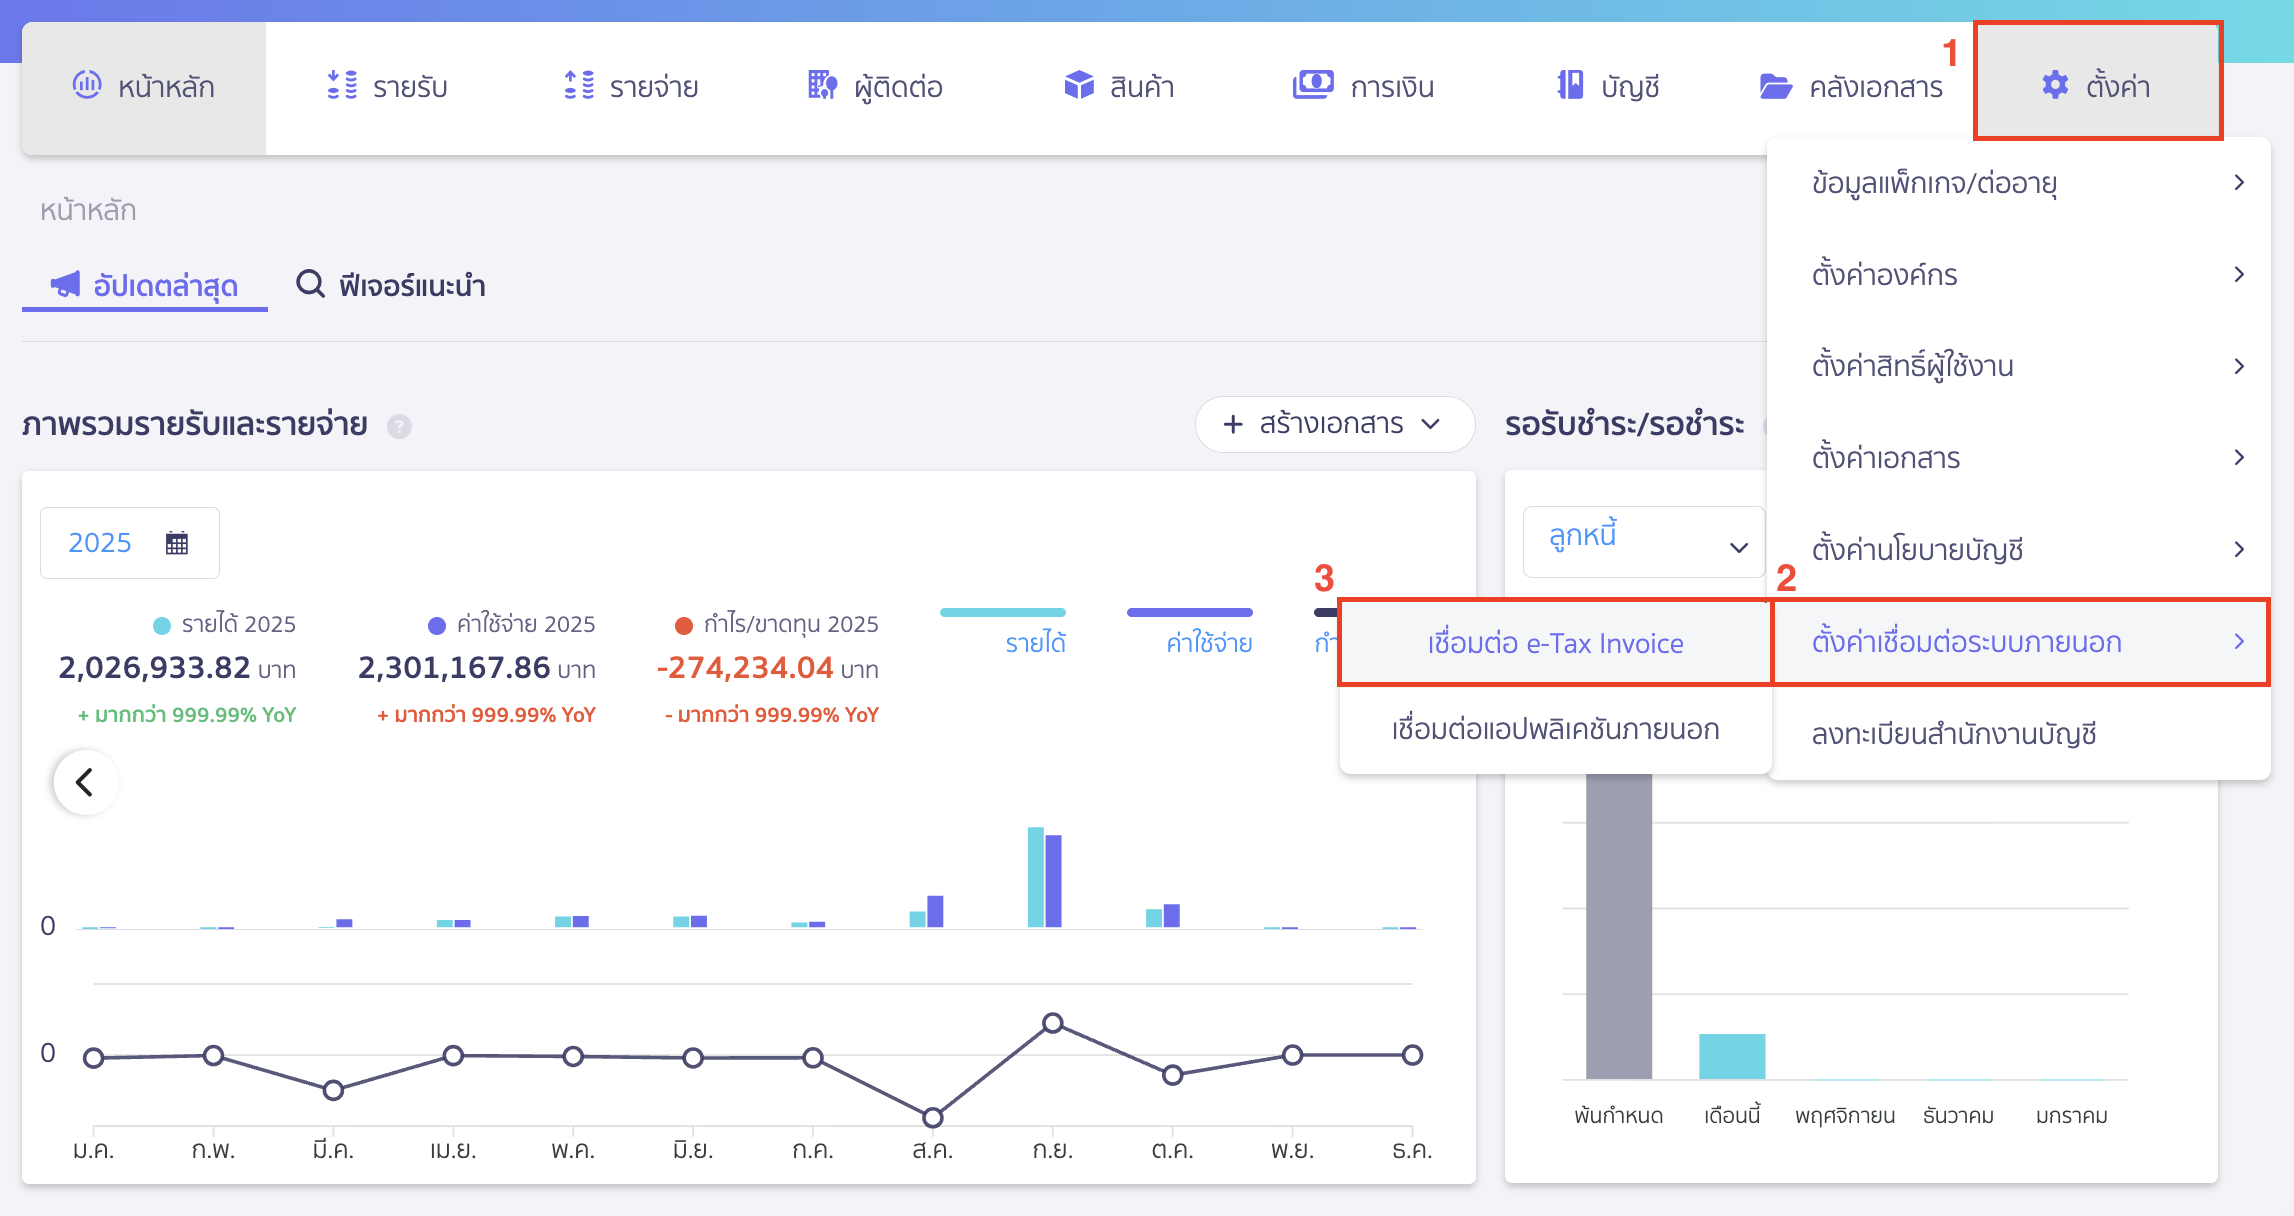
1.1. เข้าสู่เมนูการเชื่อมต่อ e-Tax Invoice
ไปที่เมนูตั้งค่า > ตั้งค่าเชื่อมต่อระบบภายนอก > เชื่อมต่อ e-Tax Invoice

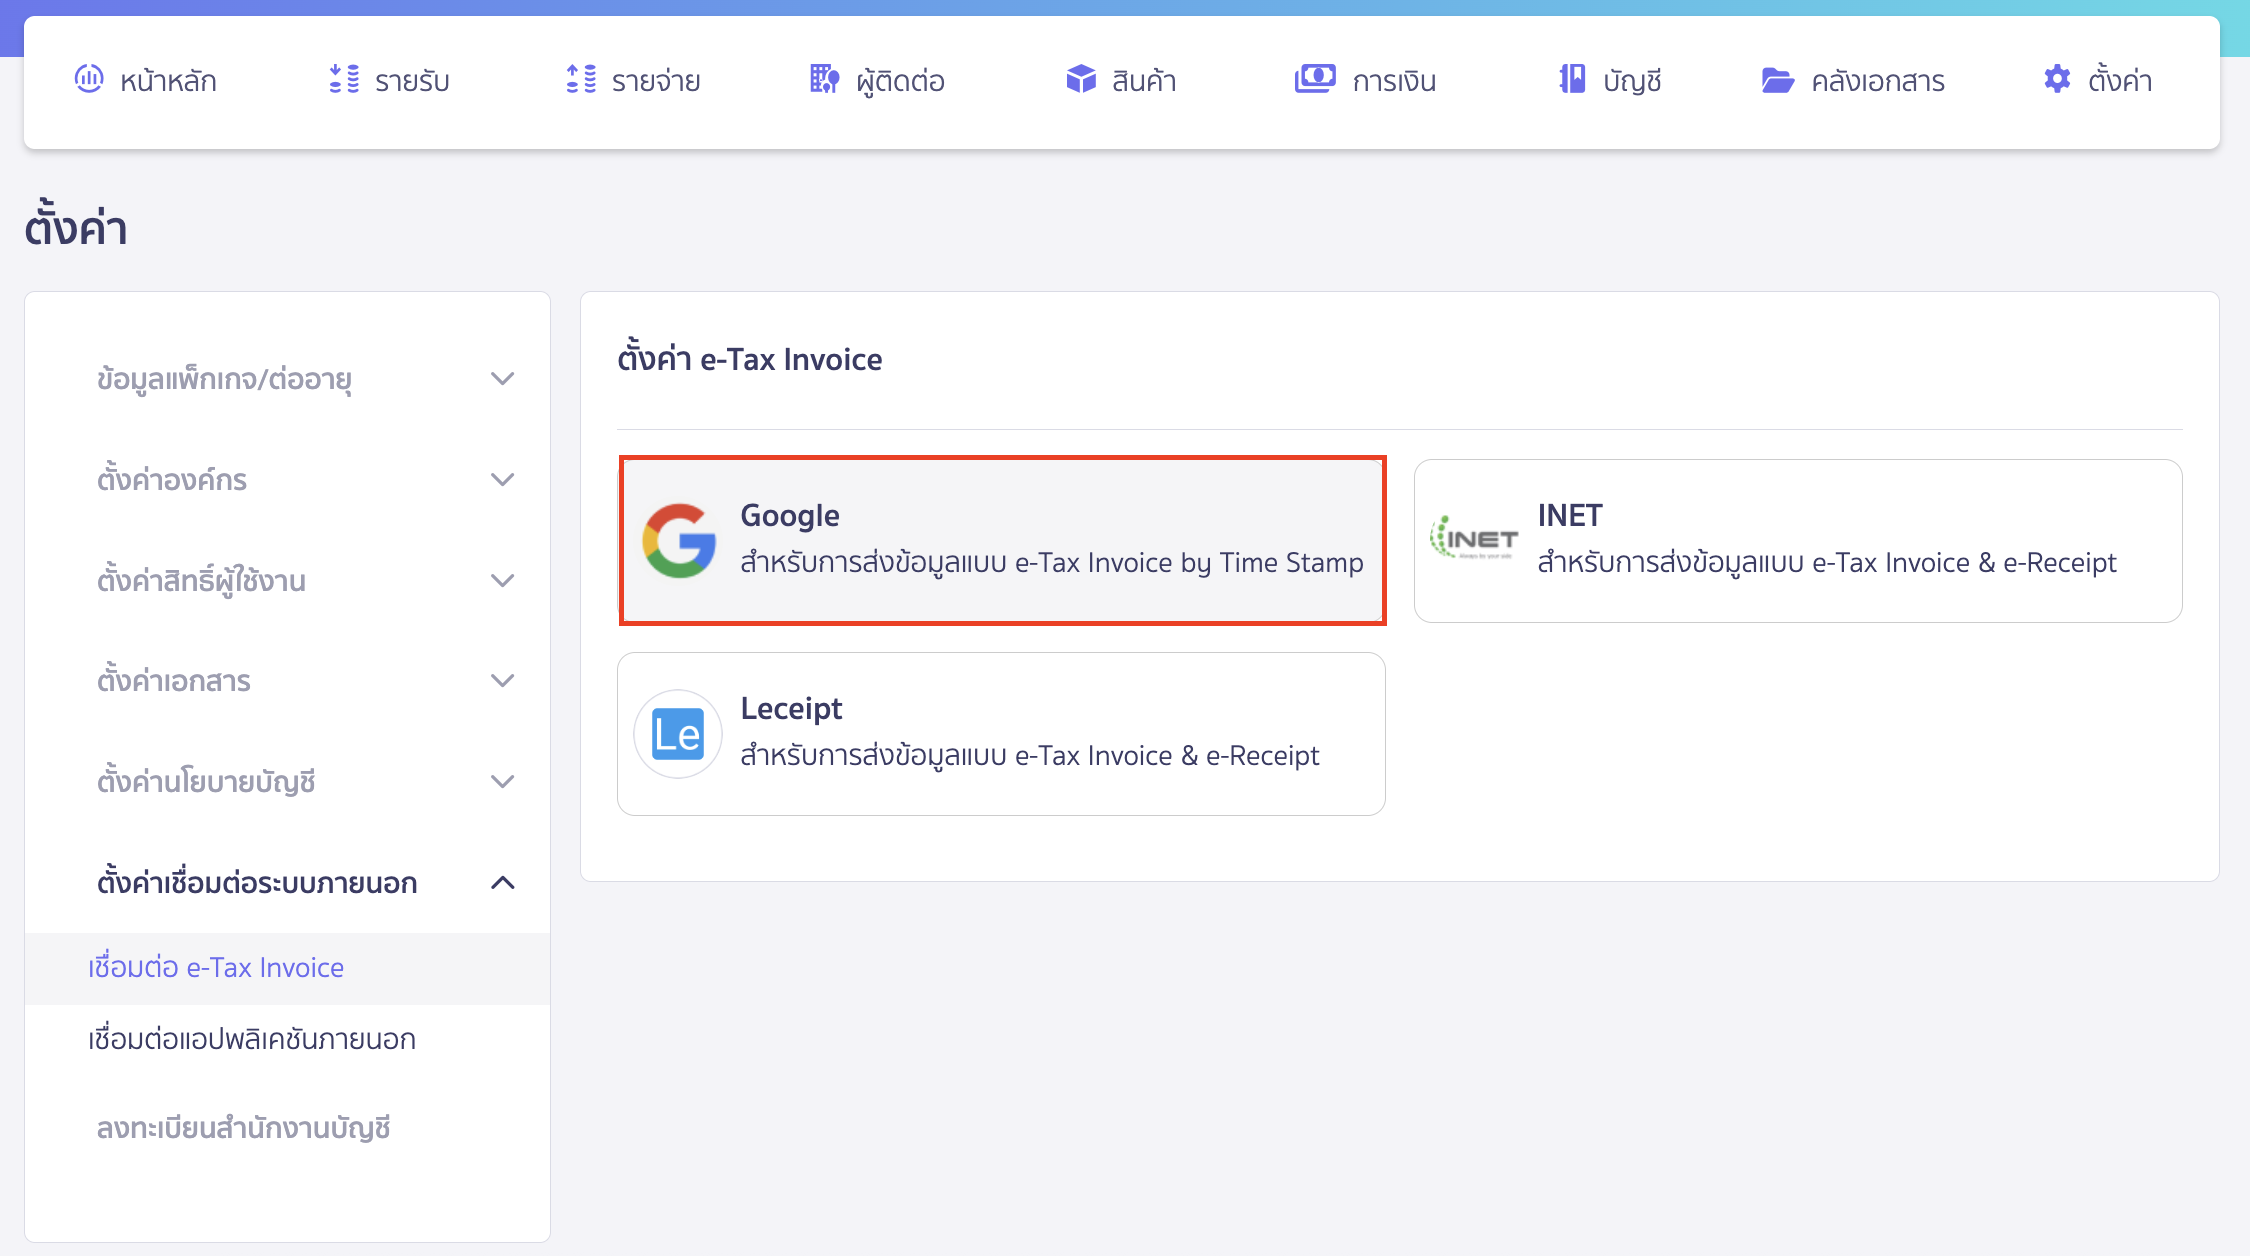
1.2. เลือกช่อง Google เพื่อเชื่อมต่อ
เมื่อเข้ามาที่หน้าตั้งค่า e-Tax Invoice ให้เลือกช่อง Google

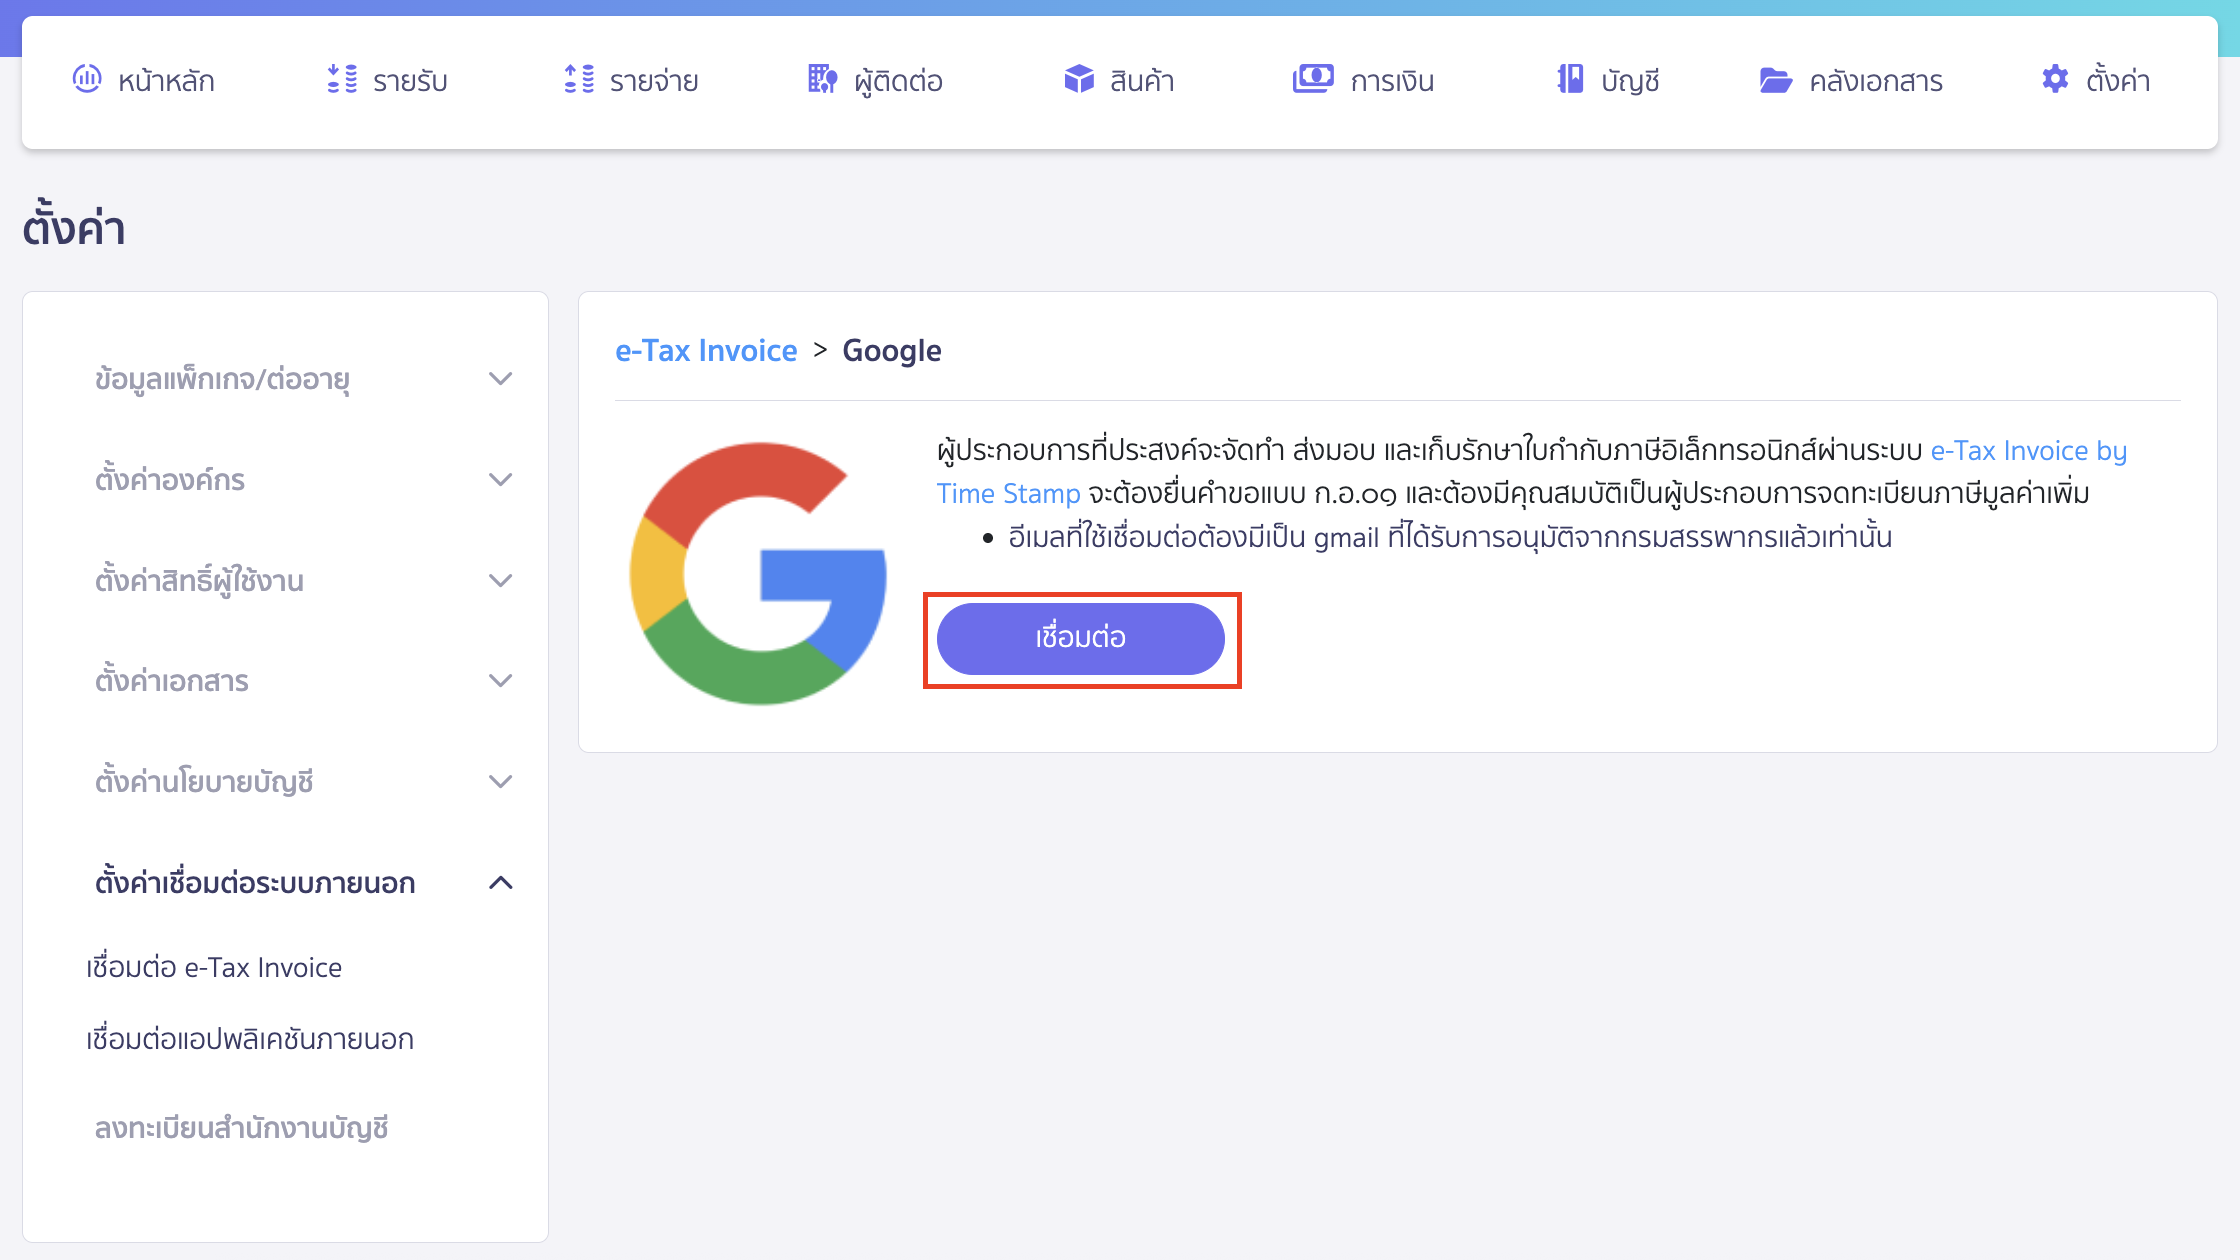
1.3. ทำการเชื่อมต่อ
คลิกปุ่ม “เชื่อมต่อ”

1.4. เลือกอีเมลที่ลงทะเบียน
เลือกอีเมลที่ได้ลงทะเบียนกับกรมสรรพากร ซึ่งต้องเป็นบัญชี G-Suite

1.5. กดยืนยัน Allow เพื่ออนุญาตการเชื่อมต่อ
คลิกปุ่ม “Allow”

1.6. ระบบเชื่อมต่อสำเร็จ
ระบบจะแสดงว่าเชื่อมต่อแล้ว

2. เลือกเอกสารใบกำกับภาษีที่ต้องการส่ง
ไปที่ใบกำกับภาษีที่ต้องการส่ง
2.1. เลือกส่ง e-Tax Invoice
คลิกที่ปุ่ม “ส่งเอกสาร” > เลือก e-Tax Invoice

2.2. ระบุรายละเอียดการส่ง e-Tax Invoice
ระบุอีเมลผู้รับ > คลิกปุ่ม “ส่ง”

– จบขั้นตอนการส่งเอกสาร e-Tax Invoice By Email –